User Guide

How to use Quesina PH

A plain-language walkthrough of every feature — from signing in to closing the day. Follow the steps, and keep a copy handy for training.

Chapter 1

Getting started

Sign in, understand what your role can see, and find your way around the dashboard.

Signing in

Quesina PH is a single secure account per person. What you can see and do depends on your role.

  1. Open the login page and enter the email address and password you were given.
  2. Press Sign in. You land on the dashboard for your role.
  3. If you forget your password, ask your HQ administrator to send a reset.

Good to know

  • HQ Admin sees every branch and all company data.
  • Branch Manager / Franchisee sees ONLY their own branch or branches.
  • Cashier / Branch Device runs the point of sale on the branch tablet.
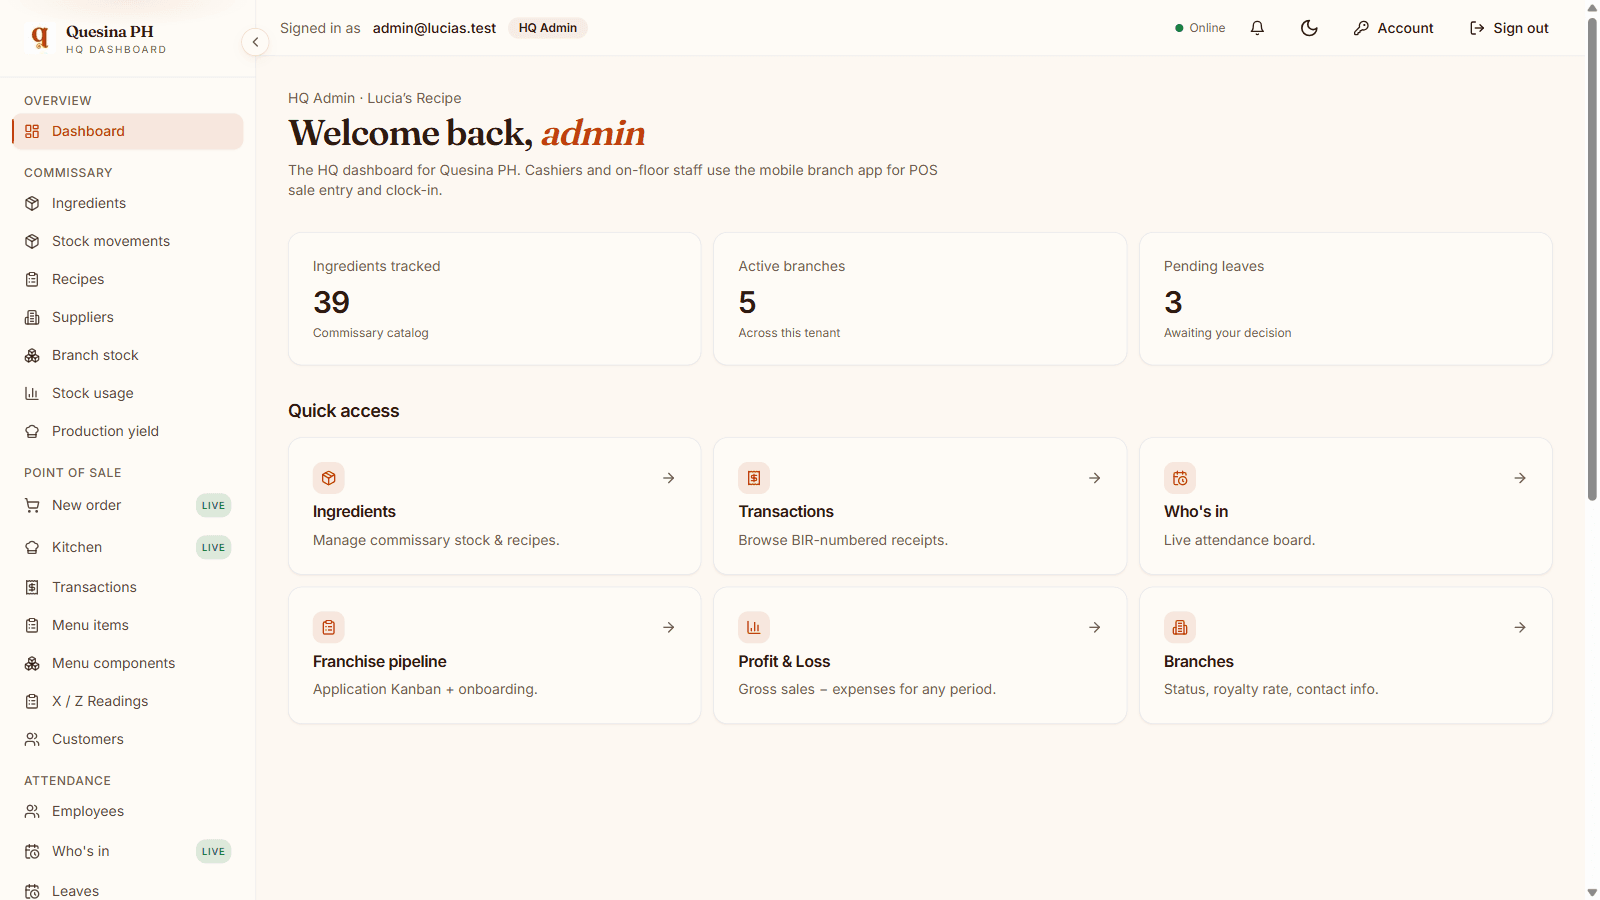
The HQ dashboard

The dashboard is your home base. It shows live numbers and shortcuts to every module.

  1. Read the live counts at the top — sales, branches, stock and people at a glance.
  2. Open the notification bell to see low branch stock, production-yield shortfalls and password-reset requests.
  3. Use the quick links to jump straight into a module.
  4. Toggle dark mode from the top bar, and open Account to manage your profile or sign out.
The HQ dashboard showing live counts, the notification bell and quick links.

Working with tables

Every list in Quesina PH works the same way, so you never have to scroll endlessly.

  1. Type in the search box to filter the list as you type.
  2. Use the page-size selector to choose how many rows show per page.
  3. Use the pagination controls at the bottom to move between pages.

Good to know

  • Search, page size and pagination appear on every list across the app.

Chapter 2

Commissary (CIMS)

The central kitchen — buy ingredients, produce menu items, and deliver to branches.

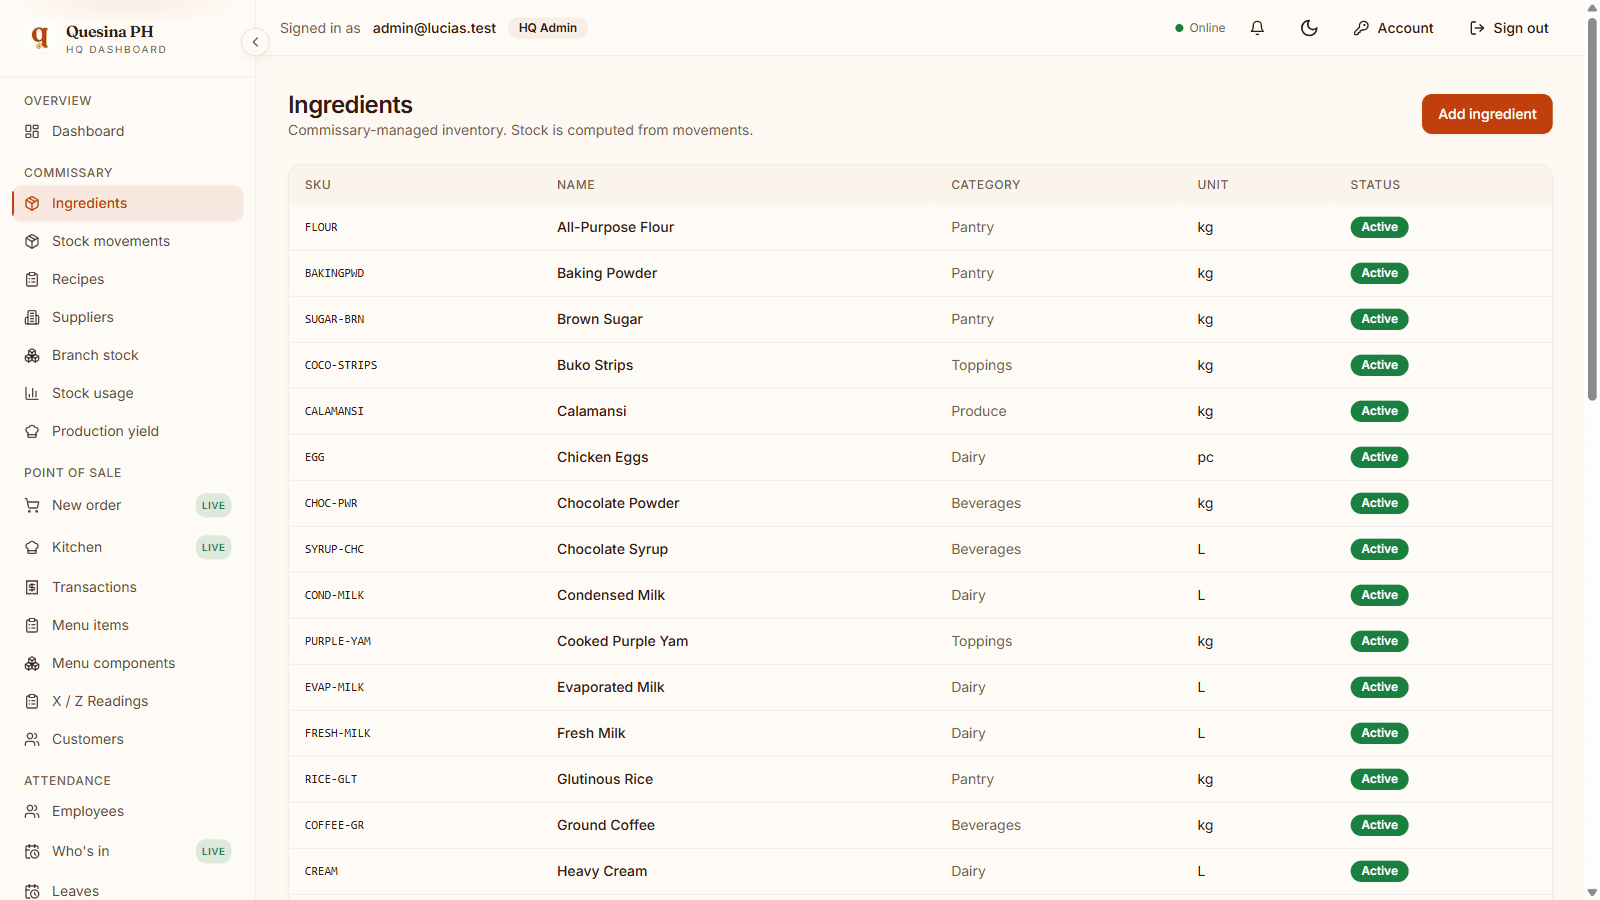
Ingredients

Ingredients are the raw materials you buy. Each one has a reorder point that drives low-stock alerts.

  1. Press Add to create an ingredient with its SKU, name, unit, category, reorder point and cost.
  2. Use the pencil icon on any row to edit it.
  3. To bulk-edit, press Download CSV, edit the file in Excel, then Import — rows are matched by SKU.

Good to know

  • When on-hand drops below an ingredient’s reorder point, it triggers a low-stock alert.
The commissary ingredients list with add, edit and CSV import controls.

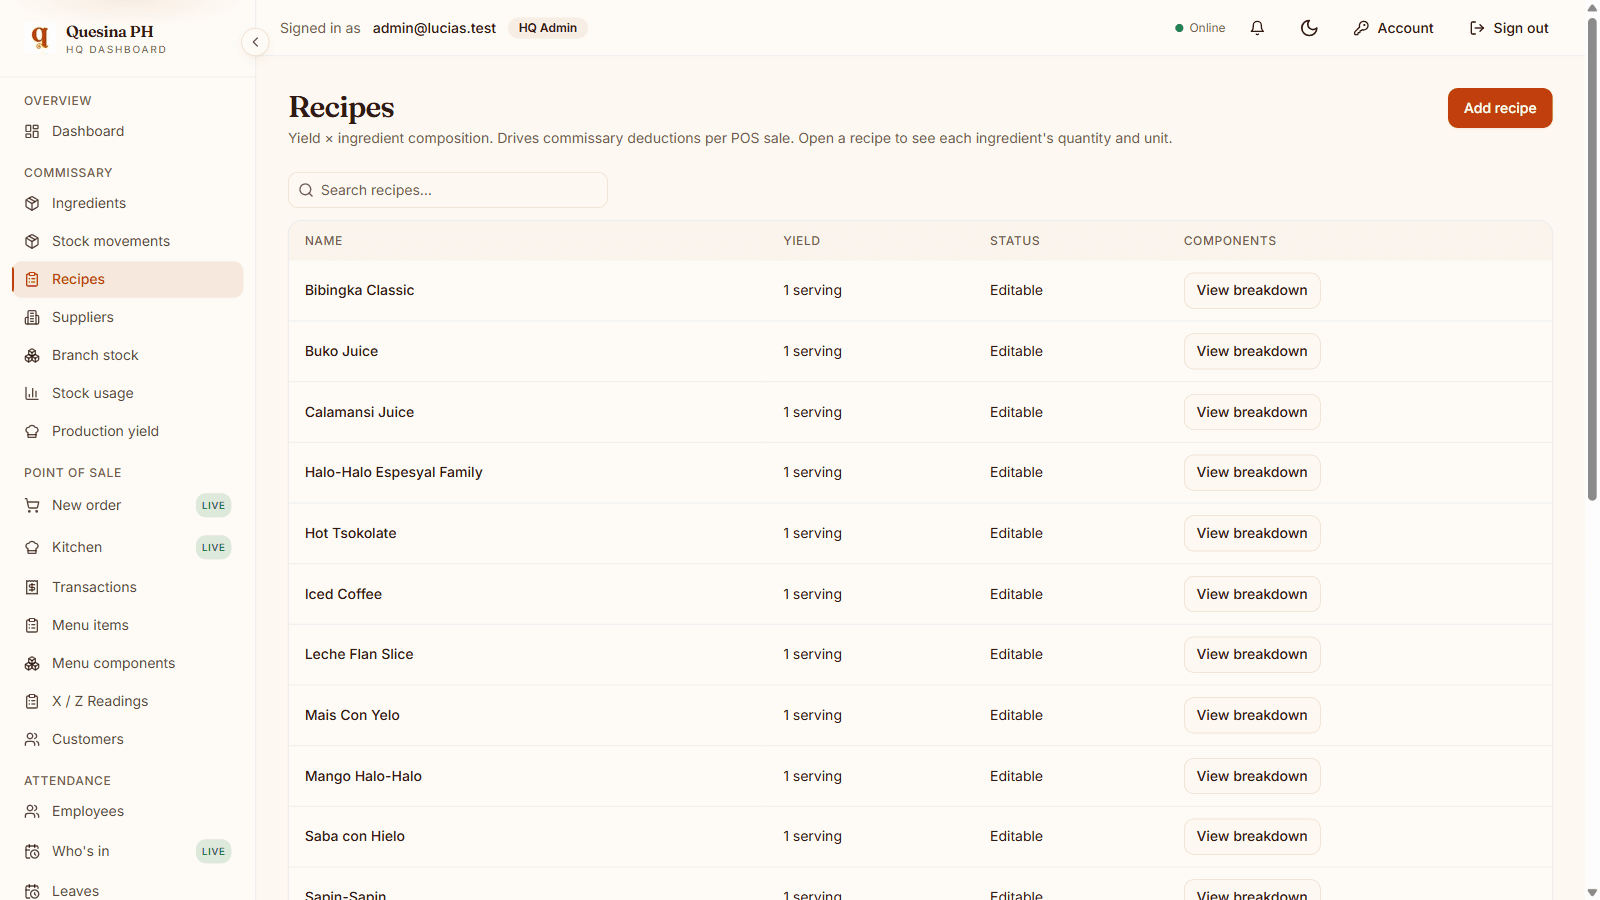
Recipes

Recipes are a reusable library of bills of materials. Build a recipe once, then apply it to any menu item to copy its components in.

  1. Press Add to create a recipe with a name, yield and its component ingredients.
  2. Apply a recipe to a menu item from the menu-item editor — its components are copied into that item, after which the recipe and the item are independent.
  3. Edit a recipe’s name, yield or components at any time.
  4. Delete a recipe, or select several and bulk-delete them.
  5. Use Import / Export to move recipes in bulk — one row per component; any missing ingredient is auto-created.

Good to know

  • Applying a recipe COPIES its components, so editing or deleting the recipe afterward never changes a menu item that already used it — those components stay put.
The reusable recipe library with add, edit, delete and bulk-delete.

Suppliers

Suppliers are the vendors you buy ingredients from. Stock-ins reference a supplier.

  1. Press Add to record a supplier, or the pencil to edit one.
  2. Use Import / Export to manage the supplier list in bulk.

Stock movements

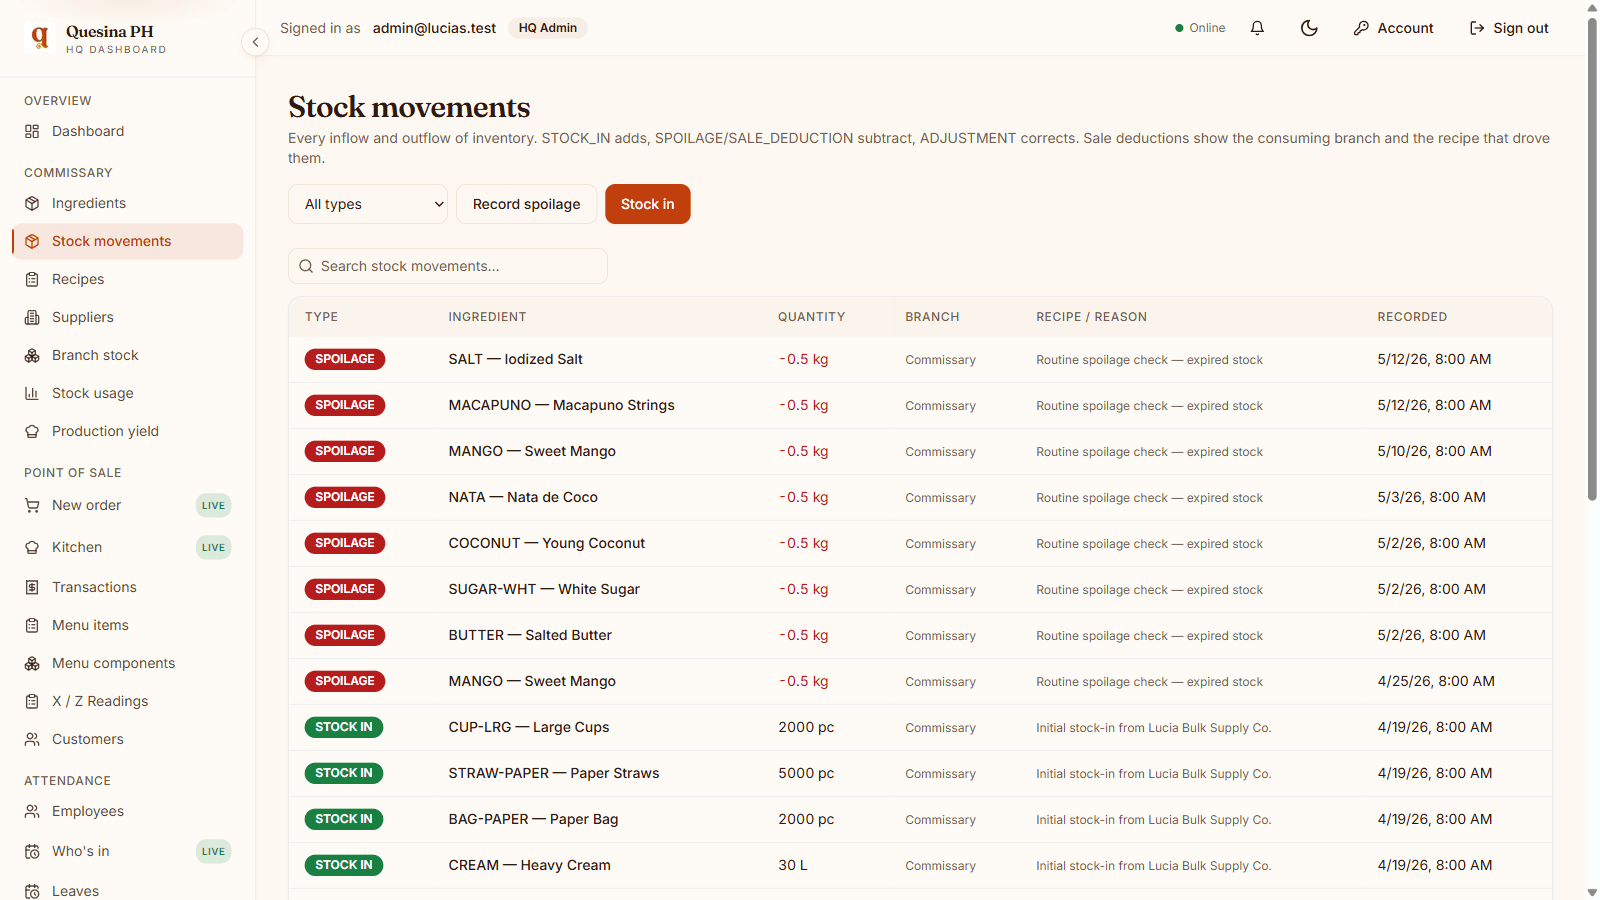
The stock ledger is permanent. Every change to stock is a typed movement, and on-hand is always the running total.

  1. Open Stock movements to see the full, immutable history.
  2. Read the movement type on each row: STOCK-IN, PRODUCTION, SALE DEDUCTION, TRANSFER, SPOILAGE or ADJUSTMENT.
  3. Use the date-range summary on top for a consolidation overview — totals by movement type and the net change per component over the period.
  4. Trust the on-hand figure — it is always the sum of every movement, so it can never drift.
The immutable stock-movement ledger listing typed movements.

Branch stock

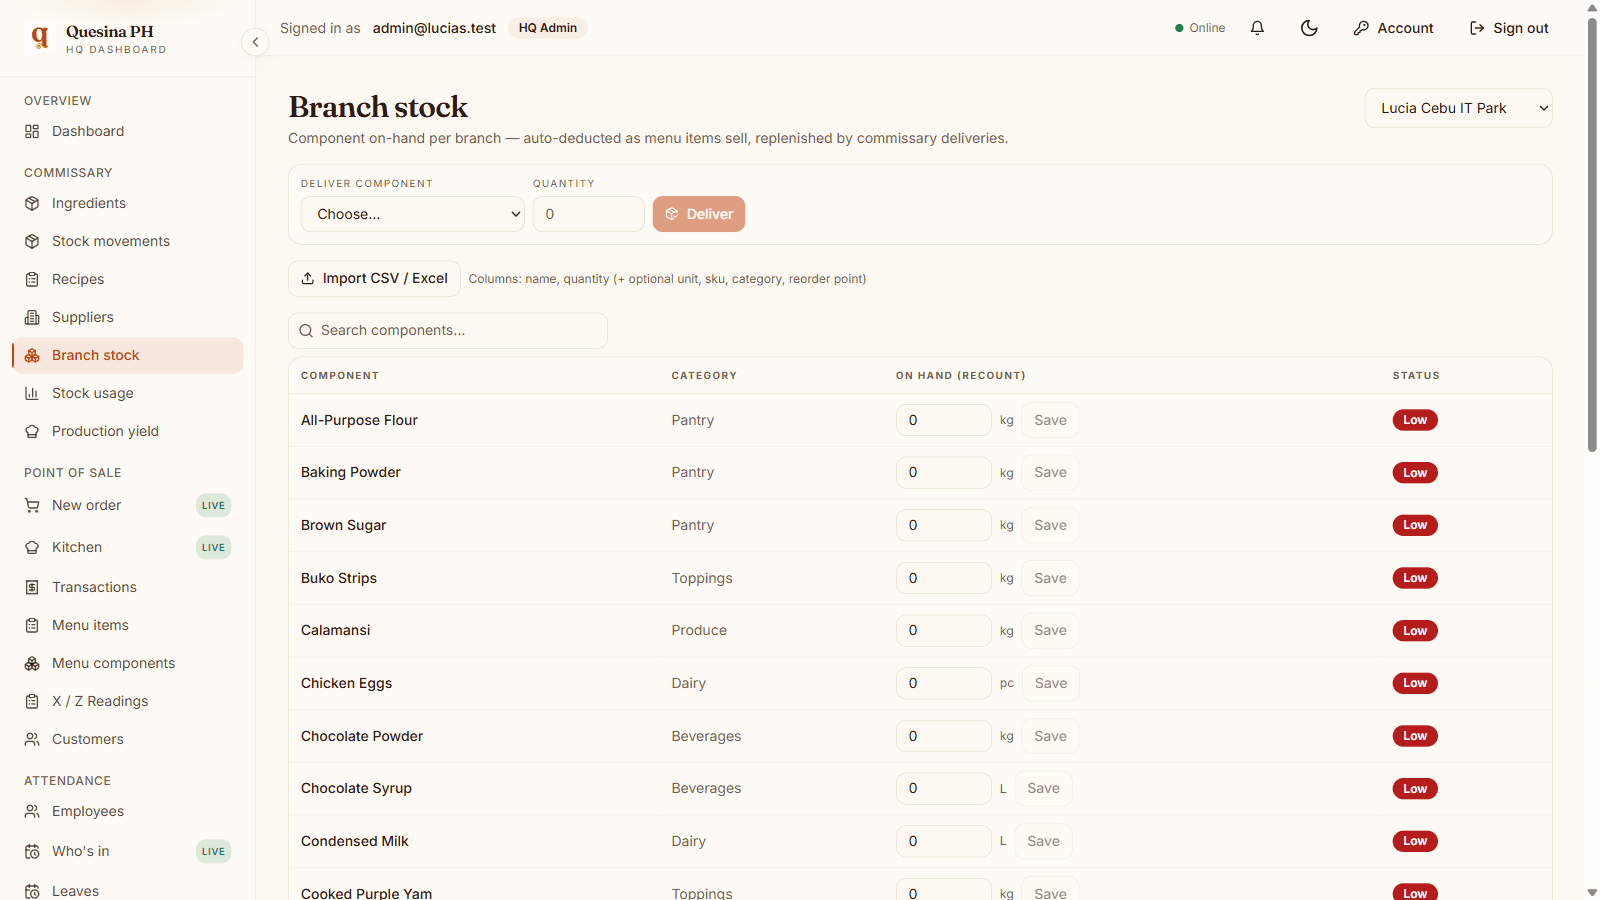
Branch stock tracks what each branch holds, separate from the commissary.

  1. Record a delivery to a branch — the commissary on-hand is checked and you are warned if you would overdraw.
  2. Recount any item inline when a physical count differs.
  3. Delete a component you no longer stock — if any menu items use it, a warning lists them first so you can decide.
  4. Use Import CSV / Excel to update many branch stock figures at once.

Good to know

  • Low-stock badges appear on any branch item below its reorder point.
Per-branch stock with delivery, inline recount, import and low-stock badges.

Stock usage

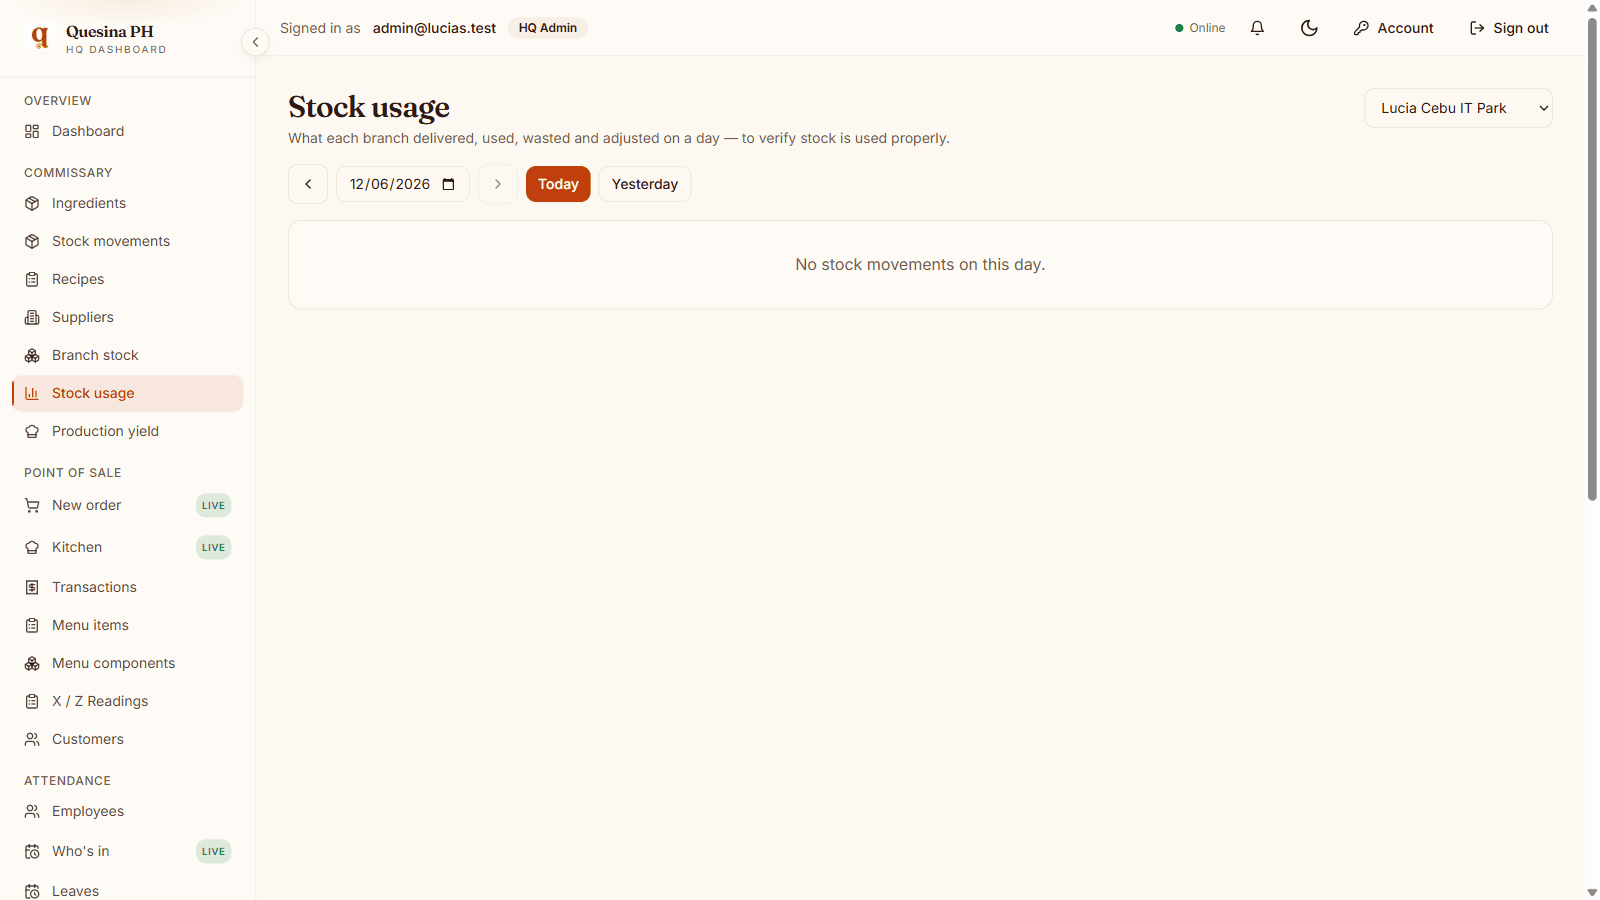
Stock usage answers "where did the stock go?" for one branch on one day.

  1. Choose a branch and a date.
  2. Read the Day summary cards on top — total delivered, used, wasted and the net movement for that day.
  3. Scan the per-component breakdown: delivered, sold, wasted and adjusted.

Good to know

  • Voided sales are netted out automatically, so the numbers reconcile.
Stock usage for a branch and day showing delivered, sold, wasted and adjusted.

Production yield

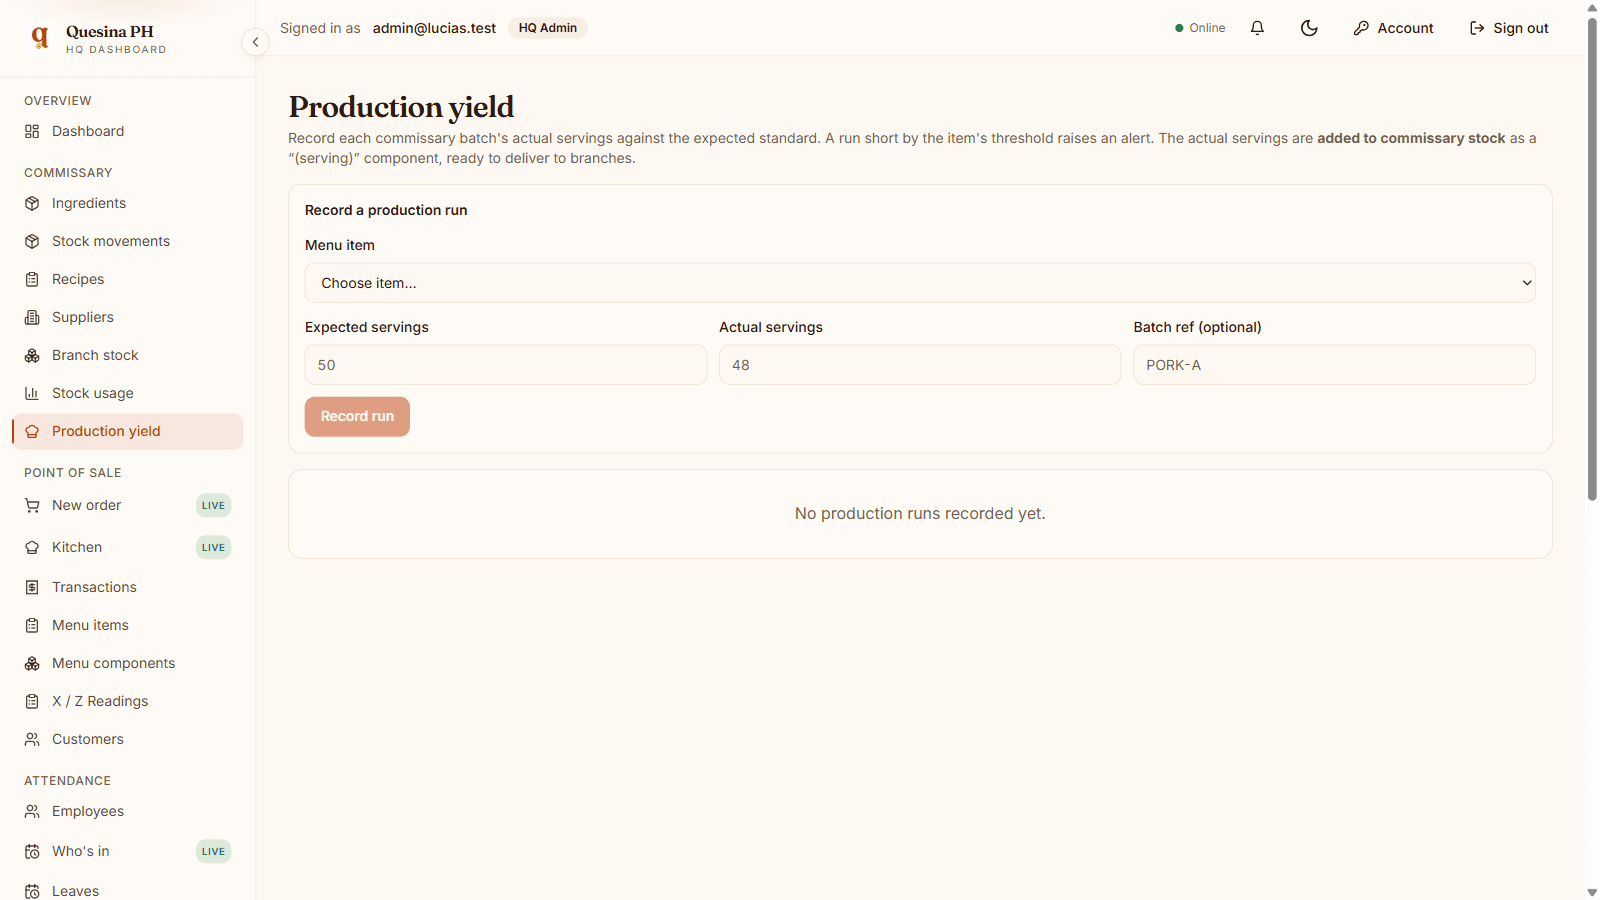
Production yield records how a batch actually performed versus what you expected.

  1. Record a batch with the expected and actual number of servings.
  2. Watch the live shortfall warning if actual falls short of expected.
  3. The finished output is stocked as deliverable servings, ready to send to branches.

Good to know

  • Shortfalls stay on the HQ notification bell until someone acknowledges them.
Production yield recording expected versus actual servings with a shortfall warning.

Chapter 3

Point of Sale

Take orders, manage the menu, and keep sequential, day-closed sales records on every device.

New order

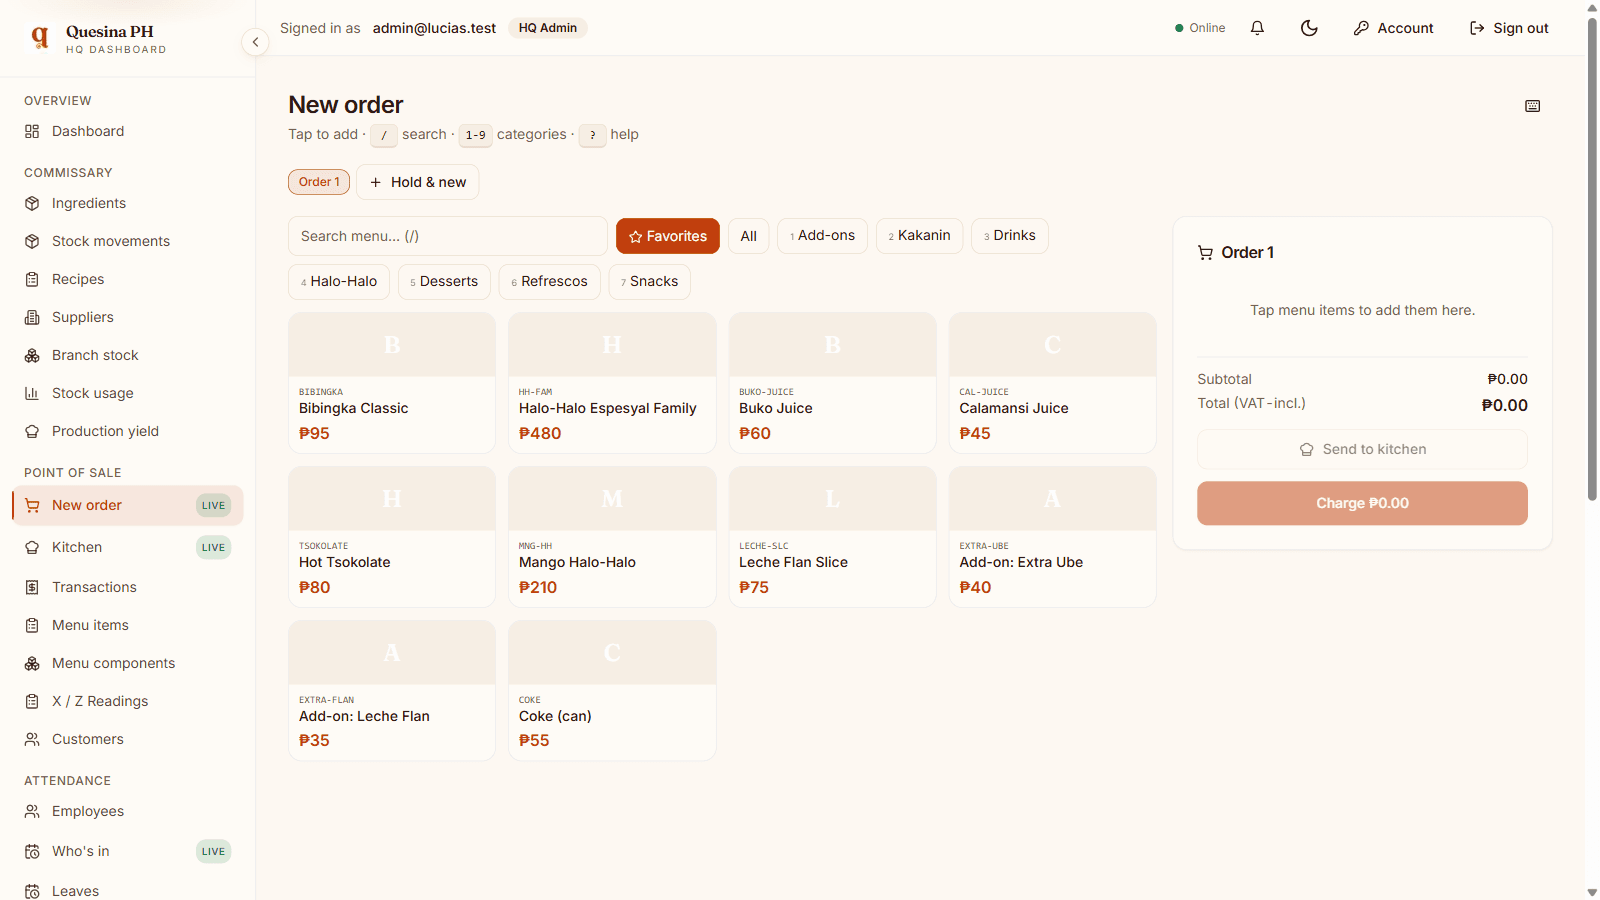
The order screen is built for speed at the counter.

  1. Pick a category tab and tap items to add them to the cart.
  2. Apply a discount when needed — Senior or PWD discounts require an ID.
  3. Take payment by Cash, GCash, bank transfer or charge-to-account.
  4. For a Cash payment, an open cash drawer is required — if none is open you’ll be prompted to open one (with a starting float) before charging. Digital payments are never gated.
  5. Park an order to set it aside, then resume it later from the parked list.
The POS new-order screen with category tabs, cart, discounts and payments.

Transactions

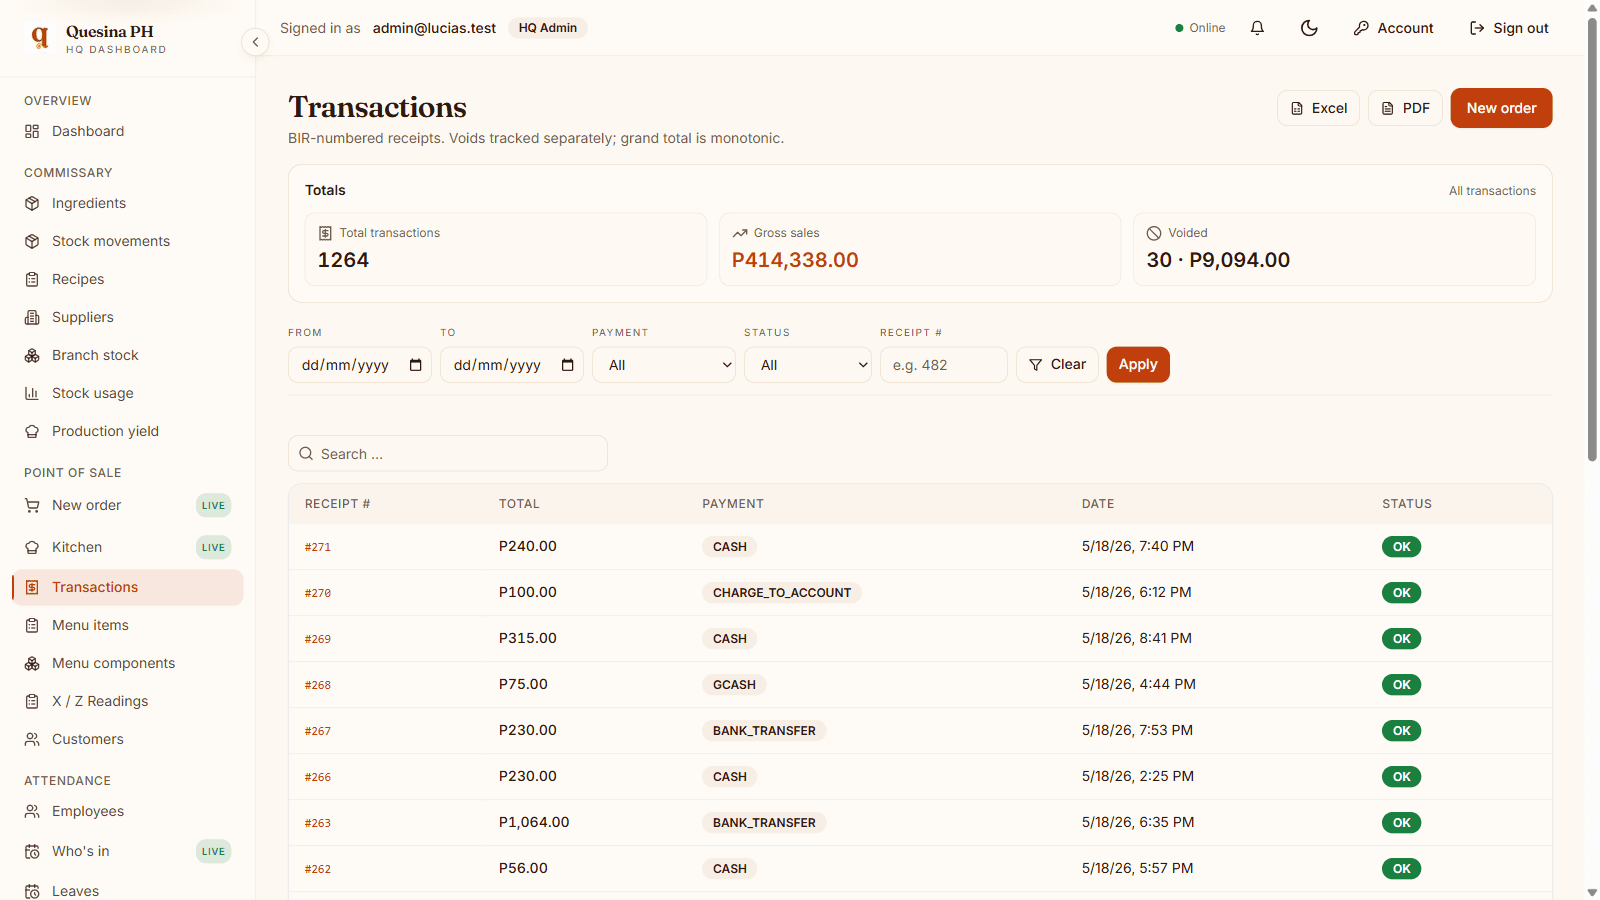
Every completed sale gets a sequential receipt number you can find later.

  1. Open Transactions to browse every sale, each with its sequence number.
  2. Search to find a specific transaction.
  3. Void a transaction when needed — voiding restores the branch stock it consumed.

Good to know

  • Printed receipts are clearly marked “THIS IS NOT AN OFFICIAL RECEIPT” and “not valid for claim of input tax” — they are provisional records, not BIR official receipts.
Searchable transactions list with sequential receipt numbers and void.

X / Z Readings

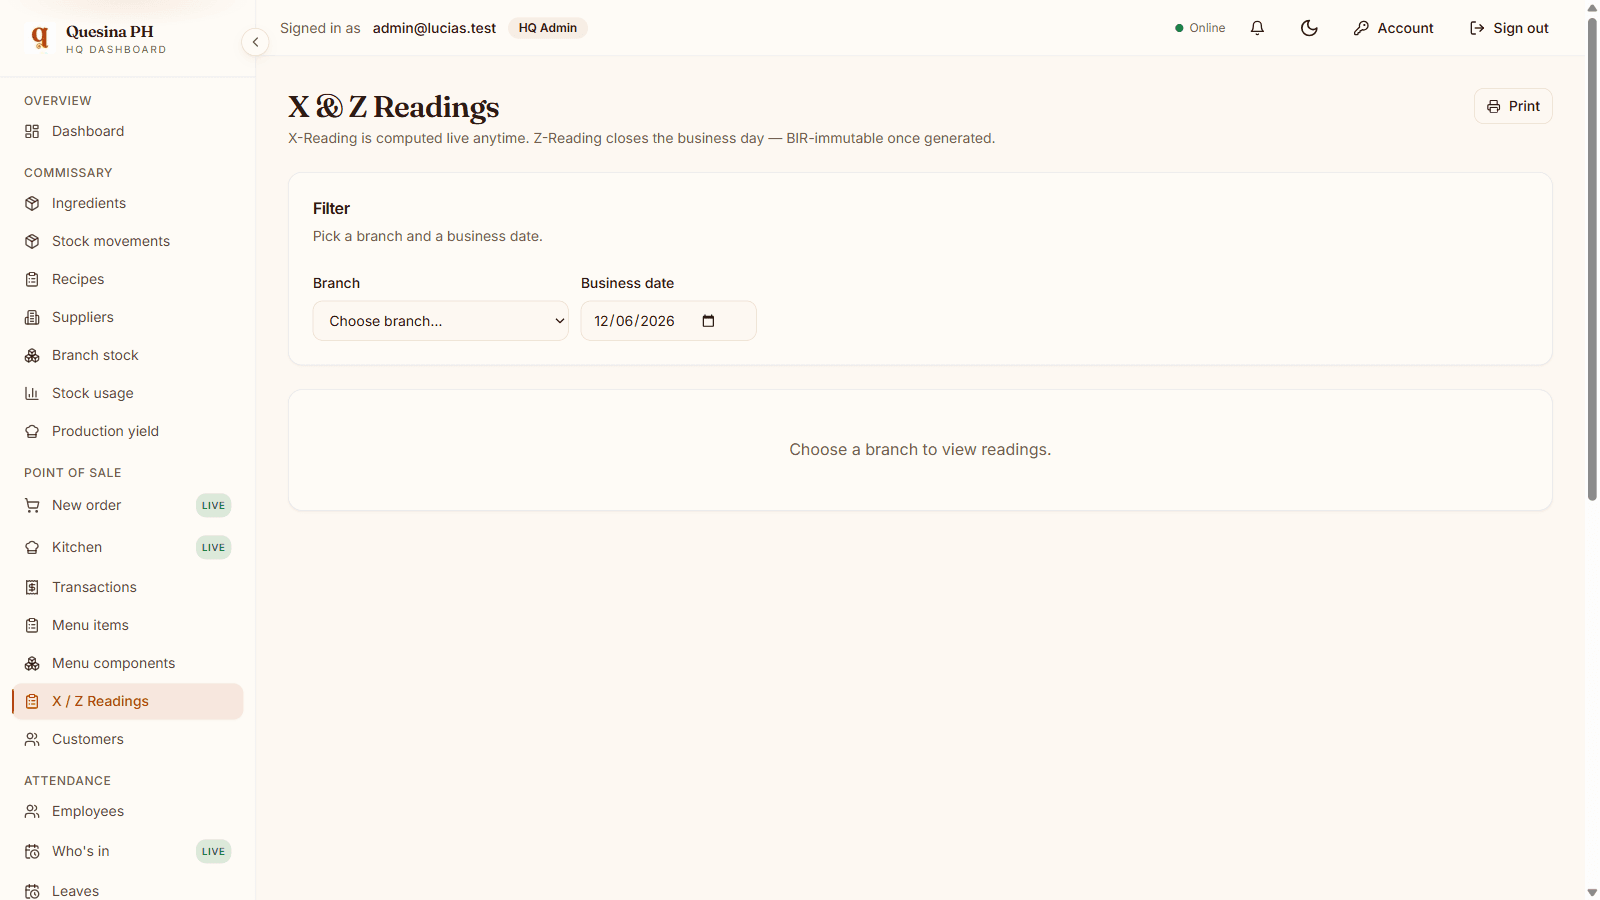
Readings are your end-of-period sales totals — X anytime, Z to close the day.

  1. Run an X-Reading at any time for a running total without closing the day.
  2. Run a Z-Reading to close the business day — this is permanent and can never be changed.
X and Z readings — X anytime, Z closes the day permanently.

Customers

Customers let you run charge-to-account tabs for regulars and partners.

  1. Add a customer to open a charge-to-account tab.
  2. Choose that customer at payment time to charge an order to their account.

Chapter 4

Accounting

Track outflows and profitability, branch by branch.

Expenses

Expenses are every outflow you record against a branch.

  1. Press Record expense and choose the branch it belongs to.
  2. Filter the expense list by branch to focus on one location.
  3. Edit an expense with the pencil, or delete one entered by mistake.
  4. Void an expense to keep it for audit while removing it from profit & loss.
  5. Use Import / Export for bulk entry — branch is matched by code, category by name.

Good to know

  • HQ Admin can file an expense for any branch, tenant-wide.
  • A Branch Manager only sees and can file expenses for their OWN branch or branches.

Categories

Categories are the taxonomy that organizes your expenses.

  1. Add a category to group related expenses, or rename one with the pencil.
  2. Activate or deactivate a category to control whether it shows when filing expenses.
  3. Delete a category you no longer need — if any expenses still use it, you’ll be warned and asked to deactivate it instead.
  4. Use Import / Export to manage categories in bulk.

Cash drawer

A cash drawer session reconciles the physical cash in the till against what the system expects, per cashier shift.

  1. Open a drawer at the start of a shift with its starting float.
  2. Take cash sales as usual — each is linked to the open drawer.
  3. Close the drawer to count the cash: it shows the expected amount (float + that shift’s cash sales) and the variance against your count.

Good to know

  • A cash sale requires an open drawer — the POS prompts the cashier to open one if needed. Digital payments are not gated.
  • A closed drawer session is permanent and cannot be edited, for audit integrity.

Profit & Loss

The P&L shows what each branch earned after costs.

  1. Open Profit & Loss to see gross sales minus expenses.
  2. Read the breakdown by expense category.

Good to know

  • Branch Managers see the P&L of their OWN branches only.

Chapter 5

Reports

Slice and aggregate your sales however you need.

Sales report

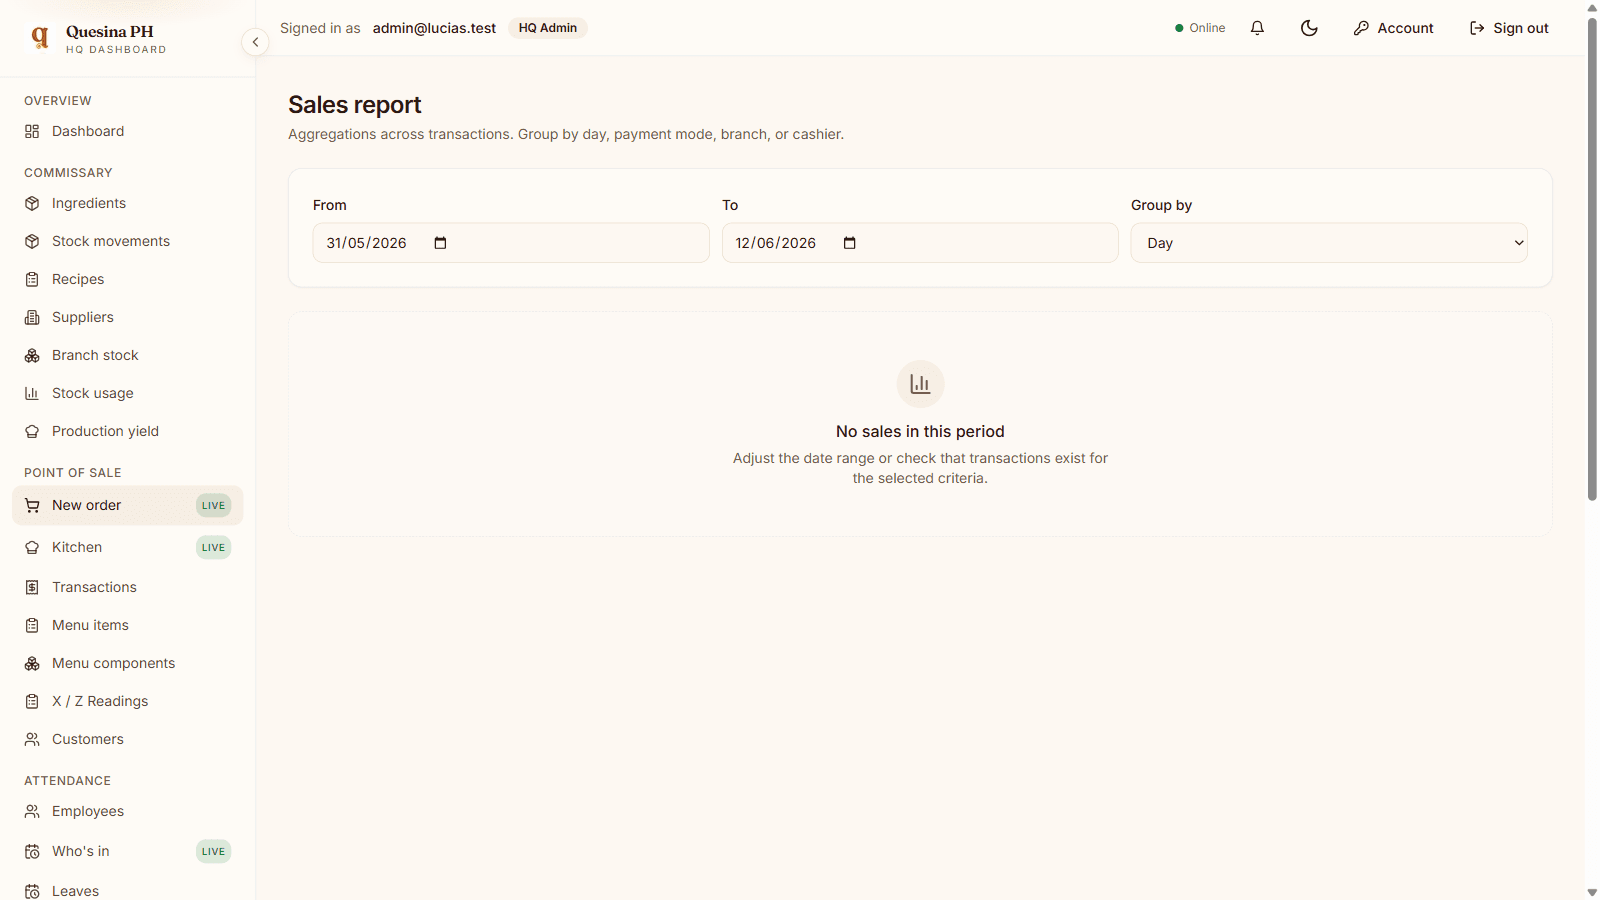
The sales report aggregates sales across any date range.

  1. Choose a date range.
  2. Group by day, payment mode, branch or cashier.
  3. Apply a branch filter to narrow the results.

Good to know

  • Branch Managers see only their own branches’ sales.
The sales report grouped by day, payment mode, branch or cashier.

Chapter 6

Franchise (FMS)

Manage branches and franchisees, and control who can see what.

Branches & franchisees

This is where you set up branches and the people who own and run them.

  1. Press Onboard a franchisee to create a branch plus a Branch Manager login and a shared Branch Device login in one step.
  2. Alternatively, assign an existing manager to a branch.
  3. Read the Owner column on the branch list — it shows the franchisee, or "Company (HQ)".
  4. Assign or unassign a branch to a franchisee at any time; one franchisee can own multiple branches.
  5. Open the franchisees roster to see each franchisee and the branches they own.

Data access & isolation

Quesina PH keeps each franchisee’s data walled off from the others.

  1. Remember that every Branch Manager / Franchisee can only access data within their own branches — expenses, sales, P&L and stock.
  2. The HQ Admin sees all branches.
  3. After you assign or unassign a branch, the franchisee must sign in again before their access updates.

Chapter 7

Attendance (ETAS)

Track time and manage your people.

Who’s in

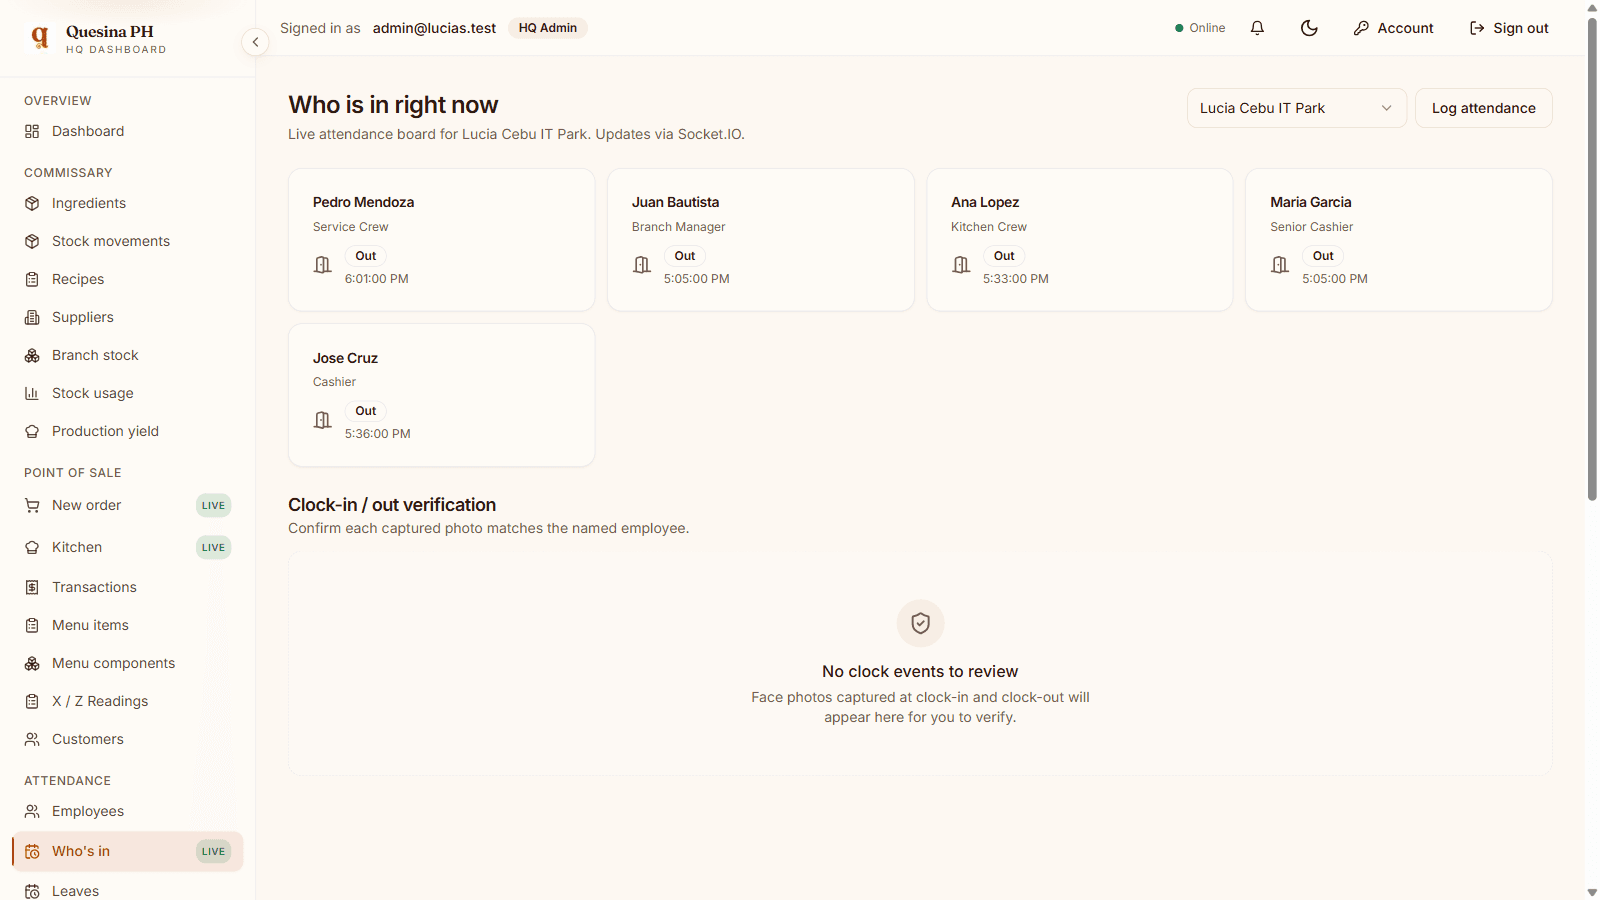
The Who’s in board shows who is currently clocked in, live.

  1. Open Who’s in to see everyone currently on the clock.
  2. Watch the board update as staff clock in and out.
The live clocked-in board showing who is currently in.

Employees, Leaves, Shifts & Holidays

These four lists cover the rest of your people admin.

  1. Use Employees to manage your staff records.
  2. Use Leaves to review and approve leave requests.
  3. Use Shifts to define the work shifts staff are scheduled on.
  4. Use Holidays to record holidays that affect pay and scheduling.

Chapter 8

Exporting & printing

Get your data out — to Excel, and to PDF.

CSV / Excel round-trip

The same import / export pattern works across the whole app, so once you learn it you can use it everywhere.

  1. Press Download CSV to get the current list as a spreadsheet.
  2. Edit the file in Excel — change values, add rows, fix typos.
  3. Press Import to upload it back; each row updates or creates by its natural key.

Good to know

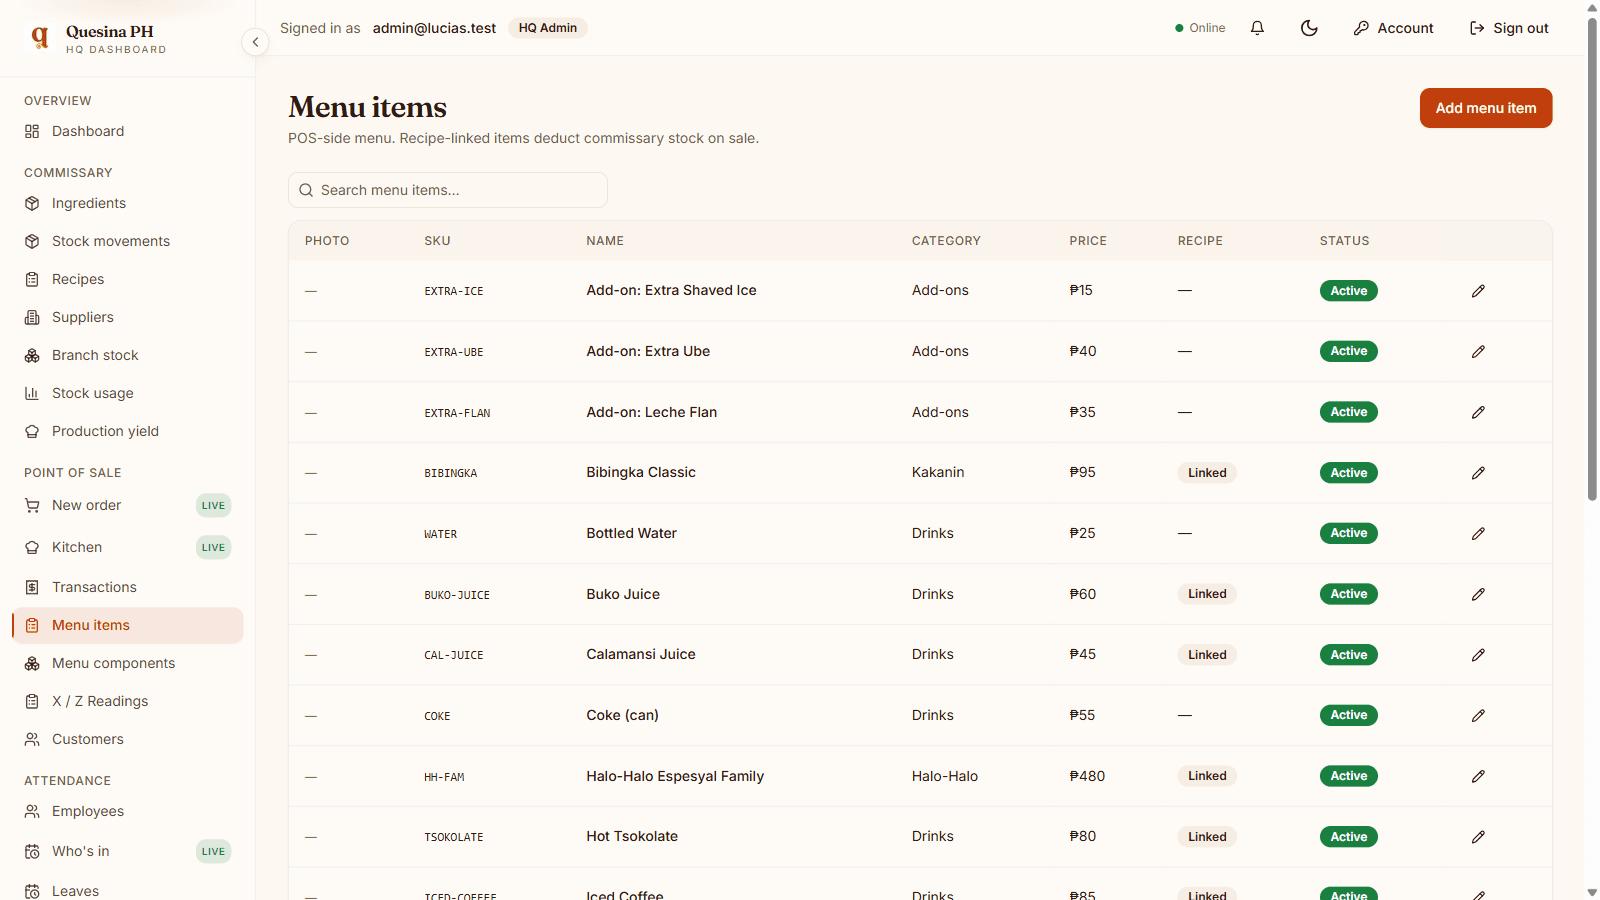
  • This works on Ingredients, Recipes, Suppliers, Menu items, Menu components, Expenses and Categories.

Save this guide as PDF

You can keep an offline copy of this guide for training.

  1. Press Download PDF at the top of this guide.
  2. In the print dialog, choose "Save as PDF" as the destination and save.